2013
In 2013, the Forensics unit was broken into two two-hour sessions. During week 1, there was one hour of fingerprinting analysis followed by a one hour forensics challenge; during week 2, there was one hour of blood spatter pattern analysis followed by a one hour forensics challenge.
Week 1, Hour 1: Fingerprint Analysis
blood spatter analysis and experimentation followed by a one hour lab.
- Students learned that the fingerprints of every individual are unique. Also, students learned about the characteristics of fingerprints, and looked at their own fingerprints and those of their classmates to identify various markings. Students also learned about AFIS, IAFIS, and the Henry Classification System.
- Fingerprinting .ppt
- Worksheet
- 10-print card
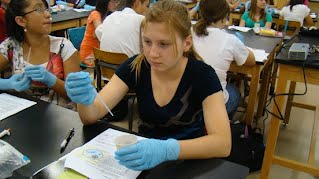
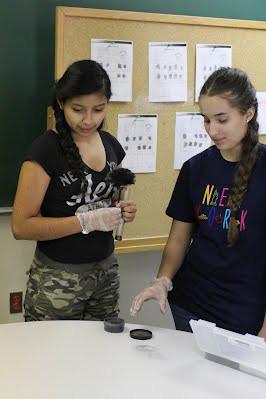
- Week 1, Hour 2: Lifting Latent Fingerprints and Forensics Challenge
- Students learned about latent fingerprints and how to collect latent fingerprints. The students practiced lifting techniques and reviewed fingerprint characteristics. In the forensics challenge for week 1, instructors placed their fingerprints on a number of items (coffee mugs, staplers, febreeze containers, etc.). Students divided themselves into teams of 4 and then lifted latent prints from the items. The challenge winners were the team that correctly matched the most number of items that instructors were holding to the instructors.
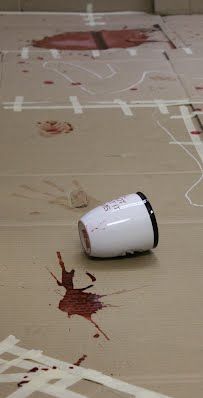
- Week 2, Hour 1: Blood Spatter
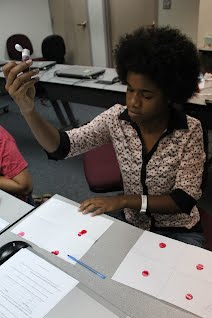
- Students learned about what is blood spatter and about the characteristics of blood spatter, as well as why blood behaves the way that it does. During the second half of the lesson, students used synthetic blood to complete lab activities so that they could see first-hand how blood behaves.
- Blood Spatter .ppt
- Video
- Worksheet/Lab
- Angle Guide
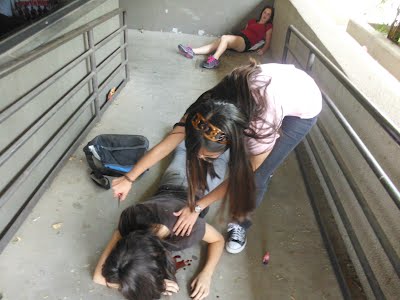
- Week 2, Hour 2: Forensics Challenge
- Instructors set up a crime scene for student teams to investigate. Instructors left fingerprint and blood spatter evidence at the crime scene. Students were asked to use what they learned from the week 1 and week 2 forensics units to identify the number and identity of victims, the number and identity of assailants, and the crime scenario. The challenge winners were the team that most correctly answered those questions.
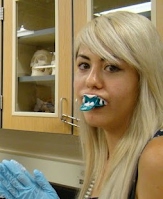
In 2012, the Forensics unit consisted of one week of finger-printing and lip-printing analysis and one week of studying and analyzing blood-spatter patterns. During the first week, students learned that the finger and lip-prints of every person are unique, and about the types of prints (latent, patent, etc.). Students took their own fingerprints and those of their classmates, and worked to identify the fingerprints of each person based on classifications of whorls, arches, and ridges. The students also learned about the Henry Classification System, and then used the Python language to write a program with input to determine a persons Henry classification number based on their fingerprint.
To learn why and how YWiC uses the Python platform, please click here.
To learn about the Henry Classification System, please visit this website: http://www.somerset.k12.md.us/JMT/LAB%20fp2%20inked%20and%20henry.htm
To learn more about Python and download the free IDE please visit this website: www.python.org/download/
You can find the Henry Classification program we wrote here: bit.ly/henryclassification
Additionally, camp instructors used App Inventor to create a mobile application to determine a person’s Henry classification system using minimal input. You can download this app by clicking this link: bit.ly/HenryClassificationApp
The second portion of the Forensics unit consisted of lessons in blood-spattering. Students learned about blood (what is it made of, how does it travel, etc.) and about blood spatter. Specifically, students learned about spatter patterns, spines, satellites, viscosity, and how the length and width of blood spatter can be used to determine the angle that blood hit a surface, and by extension, where the blood originated from. The PowerPoint camp instructors used can be accessed here: bit.ly/bloodspatter.
Students used what they learned to create a crime scene and then analyze spatter patterns from their scene using a Python program to calculate the angle of impact of the spatter (Note: The students wrote their own Python program). You can find one version of the Python program here: bit.ly/angleofimpact
Disclaimer: No camper was harmed during this camp!
Below are videos of student groups who presented skits about a murder and its crime scene investigation.
2011

In 2011, the Forensics unit consisted of one week of measuring bones and discussing bone remnants, and one week of studying and analyzing blood-spatter patterns. Students learned how anthropologists can use bone remnants from a dig site to learn about the humans that once lived there (height, weight, diet, etc.) In this unit, students learned that human height and the length of long-bones in the body and arm-span are related. They then used App Inventor to create a mobile application that would complete the long-bone measurements to height calculations, so that they would not have to do the math by hand.
In preparation for developing this app, YWiC camp instructors and students wrote out the logistics of how they wanted to compute the measurements in a java program. The first program used ulna/radius bone length to calculate human height and the second program used is a more specific version that uses designated bones: bit.ly/bonetoheight and bit.ly/bonetoheight2.
The second portion of the Forensics unit consisted of lessons in blood-spattering. Students learned about blood (what is it made of, how does it travel, etc.) and about blood spatter. Specifically, students learned about spatter patterns, spines, satellites, viscosity, and how the length and width of blood spatter can be used to determine the angle that blood hit a surface, and by extension, where the blood originated from. The PowerPoint camp instructors used can be accessed here: bit.ly/bloodspatter.